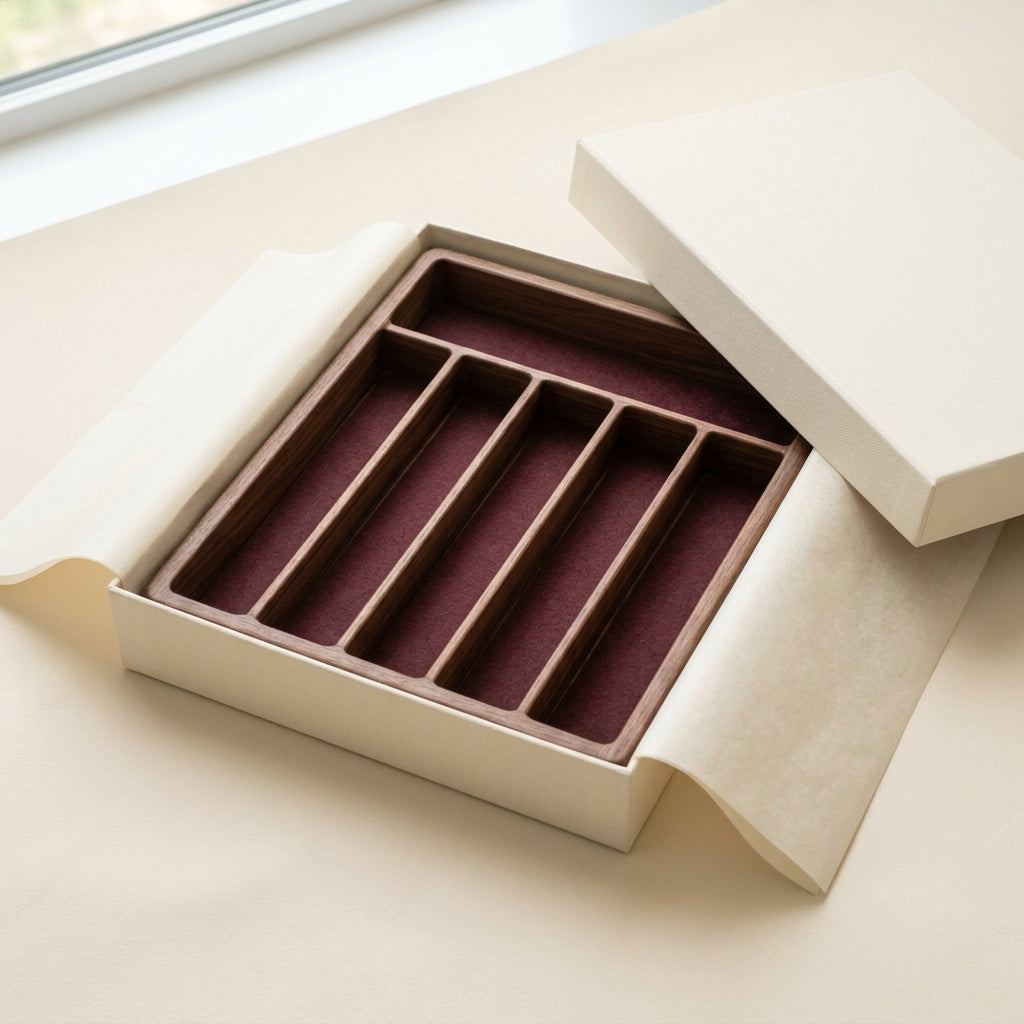
Order in Every Drawer — Walnut-Tone Cutlery Organizer with Thoughtfully Divided Compartments
Order in Every Drawer — Walnut-Tone Cutlery Organizer with Thoughtfully Divided Compartments
Couldn't load pickup availability

Order in Every Drawer — Walnut-Tone Cutlery Organizer with Thoughtfully Divided Compartments

The pleasure of opening an orderly drawer. 🤎
Some of the most satisfying details in a home are the ones you do not see until you need them. A drawer that opens to neatly arranged cutlery is one of those quiet pleasures. Order in Every Drawer pairs a dark walnut-tone frame with a deep burgundy lining, creating an interior that feels considered rather than merely filled. Clean divisions give everyday pieces a place, while the warm palette brings richness to a practical space.

Five long compartments, one crosswise compartment
The layout is deliberately straightforward. Five parallel compartments run lengthways for grouping suitable forks, spoons, and table knives. A single compartment across the back offers an alternative orientation for pieces that fit better sideways. The frame is fixed rather than expandable, so the arrangement remains visually consistent from end to end. Choose a category for each section and keep that order whenever you put clean cutlery away.
- Five lengthwise compartments.
- One crosswise compartment.
- Fixed dividers and removable burgundy liners.
A closer reading of the six-compartment layout
The five lengthwise channels create a repeated pattern, while the single section at the back runs across them. This change in direction is useful when sorting a mixture of everyday cutlery and suitable small serving pieces. The dividers are fixed parts of the layout, not sliding walls. Before choosing a category for each channel, place your longest item inside and check that it rests naturally. A neat arrangement should not depend on pressing utensils against the frame.
An example arrangement for the everyday table
Try dinner forks in the first section, smaller forks in the second, table knives in the middle, larger spoons next, and teaspoons in the last. Reserve the back section for a few suitable serving pieces that fit across its width. This is only a starting point. If your household uses more teaspoons than forks, arrange the categories accordingly. Keep the system close to your real table-setting habits, and it will be easier for everyone to put things back consistently.

A place for the pieces you reach for most
There is no single correct arrangement. Put dinner forks beside table knives if you usually set the table first. Keep teaspoons towards your preferred side if the drawer sits near a coffee area. Separate dessert spoons from larger spoons so that a quick glance is enough to find the right piece. Use the crosswise section for suitable serving pieces, but check their length and shape before deciding where they belong.
Make removal feel natural
A compartment does not need to be packed from end to end. Leave enough room to lift a fork or spoon without dragging neighbouring pieces along. If you store nested spoons, keep the stack at a height that is comfortable to grasp and clear of the closing drawer. Place sharp table-knife edges in a sensible direction and keep handling habits consistent. Oversized utensils that do not sit flat belong elsewhere rather than diagonally across several divided sections.
A drawer that more than one person can maintain
The best sorting system is one another household member can understand at a glance. Put like with like and avoid changing the order every time clean cutlery comes back from washing up. When children or guests help set the table, clear categories make the drawer easier to navigate. There is no need to fill every section on day one. Start with the everyday essentials, see how the arrangement works for a week, and adjust the categories before adding more pieces.

The colour inside the drawer
Deep wood tones give the frame a furniture-like presence, while burgundy adds a softer visual layer beneath the cutlery. Rounded outer edges and clearly defined dividers keep the silhouette restrained. The combination works as a contrast inside a pale oak drawer or as a tonal detail in darker cabinetry. Even when only half the drawer is open, the repeated lines create an immediate sense of order.
What the burgundy layer adds
The deep red tone sits beneath the cutlery rather than covering the frame, so you see it between individual pieces and along the compartment edges. It provides a deliberate contrast to silver-coloured utensils and dark wood tones. The lining is removable for access underneath, but it should be lifted gently rather than pulled against the dividers. It is not a reason to put wet cutlery away; dry the utensils first and avoid allowing moisture to remain under the lining.


Before choosing your placement
Measure the usable interior of your drawer, including any intrusion from hinges, runners, or a sloping front. Check not only the footprint but also the clearance above the organizer when the drawer closes. Your longest utensils should sit within their compartments without being forced against the ends. This is a fixed-format organizer, not a universal-fit or extendable model. The best arrangement is one that fits the drawer and the cutlery you actually own.
Measure the drawer in three directions
Start with the narrowest usable width inside the drawer, not the exterior cabinet measurement. Next, check the internal depth from the back to the inside of the drawer front. Finally, consider the height available when the drawer closes, including the highest utensil you expect to store. Runners, protruding screws, and the underside of a counter can reduce practical clearance. A cardboard outline of your available space can help you visualise placement before committing to an arrangement.
When a fixed layout is the right choice
This format suits someone who prefers a clearly defined arrangement rather than adjustable sections. Its appeal is the repeated geometry and the way the burgundy lining remains visible within the dark frame. It will not expand to fill every drawer, and it does not need to. Leaving space beside it can be useful for a separately stored tool, provided that item does not obstruct the drawer's movement. Choose a deliberate fit rather than forcing every object into the same organizer.
Keep the arrangement simple
Empty the organizer before cleaning. Lift the removable lining gently when needed and clear crumbs from the compartment corners. Use a soft cloth on the frame, avoid soaking, and let all components dry before putting them back. Return clean, dry cutlery to its assigned section rather than piling mixed pieces together. Your purchase includes one organizer with its compartment liners; cutlery, utensils, drawer cabinetry, and styling accessories are not included. Open the drawer, find what you need, and enjoy a detail that makes the everyday feel a little more deliberate.
Care beneath the surface
Small crumbs can settle beside the divider edges even when the cutlery itself is clean. Empty one compartment at a time, lift its liner carefully, and remove loose debris before wiping the frame. Dry any cleaned area before returning the liner, then add only dry utensils. Avoid soaking the organizer or scrubbing the wood-tone finish with abrasive pads. For a thorough reset, remove the whole empty organizer from the drawer and clean the drawer interior separately.